Getting Started
Ok, time for a little tutorial. Ready? Careful with that coffee, don’t spill it on the keyboard ;-)
We are going to paint a cargo bird, and I recently found out about this cargo airline based in Honolulu called Asia Pacific Airlines. They operate three 727-200 freighters and I could not find any available repaint so I decided I would have a go at them.
So first thing is to find as many pictures as possible of the subject, from all possible angles so that you can see, or at least get a hint of what is there (this is mostly true for the upper/lower surfaces, but in this case it is not very important since the US do not require over/under wing registration marks so most US registered aircraft do not carry any wing regs.)
I usually start by checking the usual picture sites, airliners.net, jetphotos.net, myaviation.net, planepictures.net. If I don’t find enough material, I then run a search on flickr, and/or a Google search for other less known sites. But unless you go for a really exotic bird that only flies in remote jungle locations, you can usually find enough material on the main sites.
In this case, I struck lucky on airliners.net, with a nice full side view of N319NE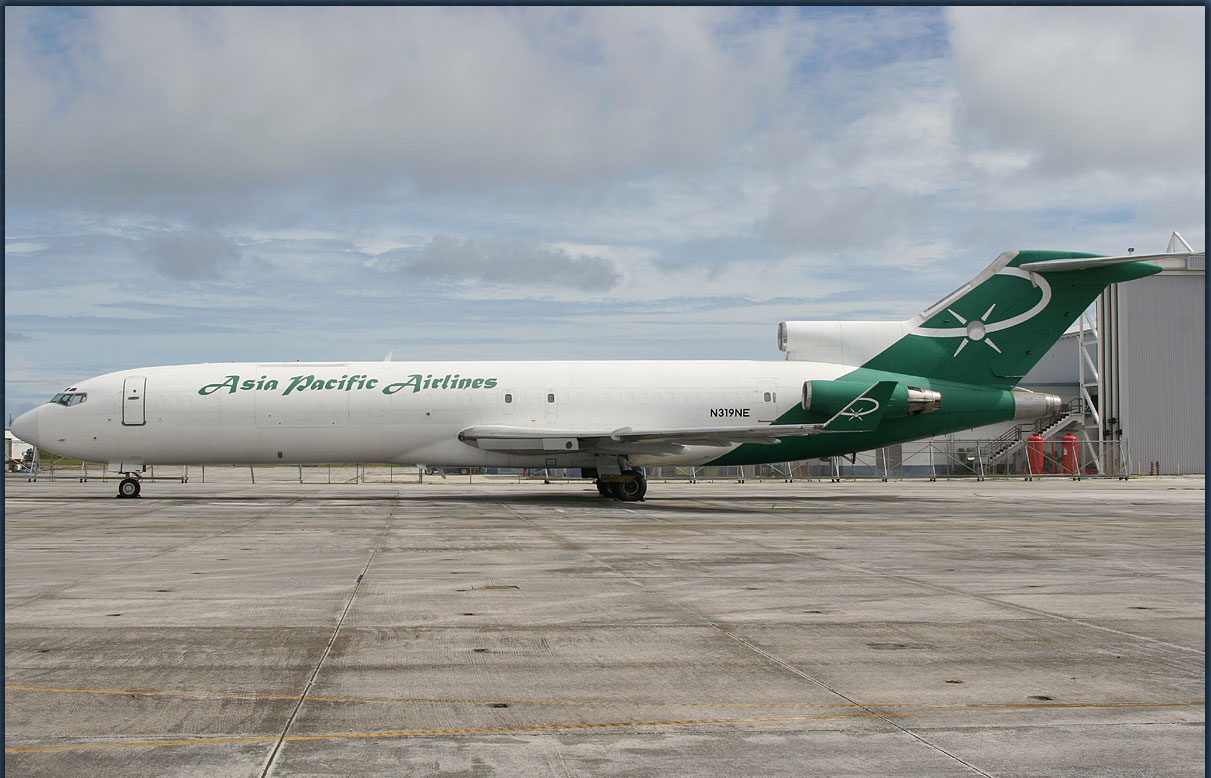
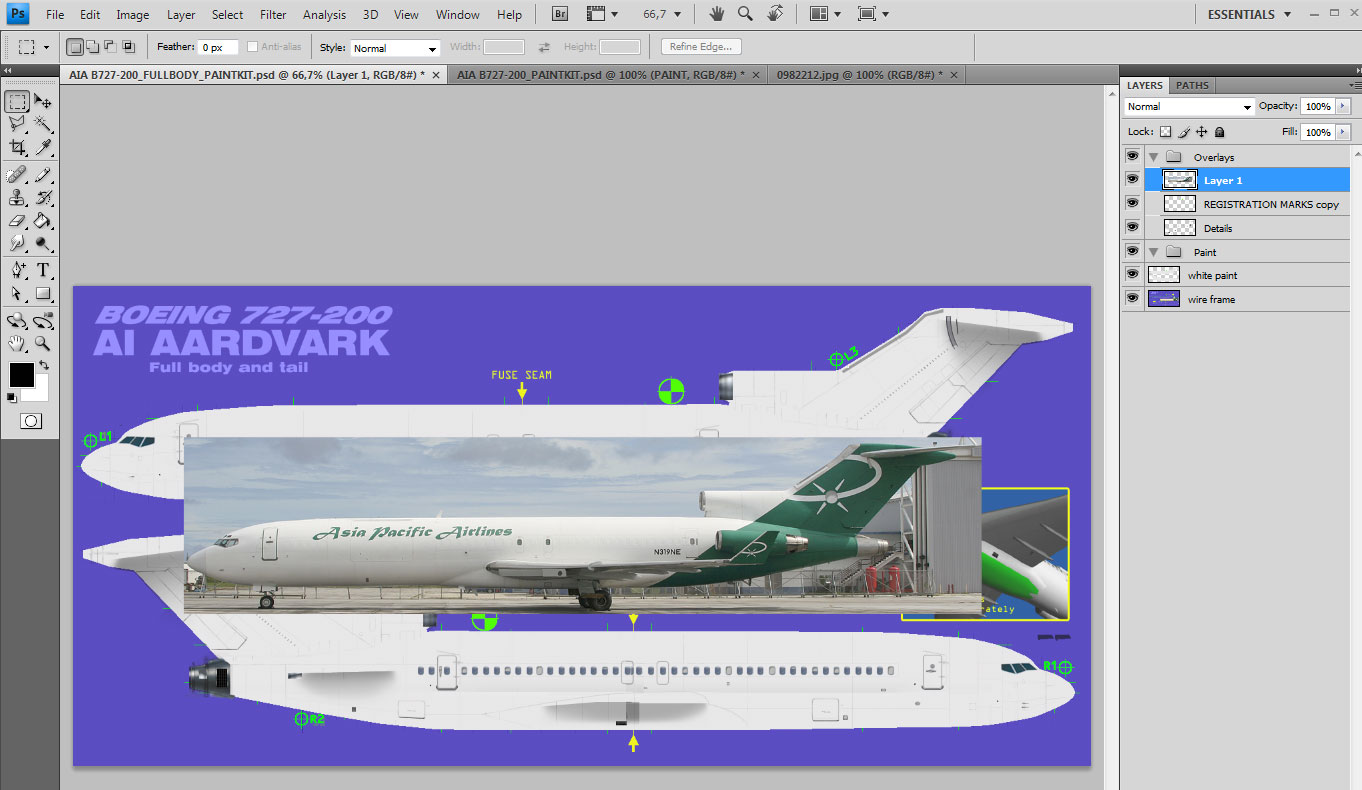
So, let’s save this image and open it in Photoshop. Using the rectangular marquee selection tool, we will now isolate the aircraft itself and copy and paste it in the full fuselage psd that you will find in the ai aardvark 727-200 paintkit.
As a rule of thumb, never use the full fuselage psd for your repaints. Because all the details are on the real paintkit, and the full fuselage when provided is only meant to make alignment of tail and fuselage sections easier for the painter.
This is what we are going to do now
The real power of Photoshop and similar programs is their ability to use layers. If you are not yet familiar with the concept, don’t worry, it is in fact very easy to use and will simply allow you to add and modify details, or mix details and add effects without changing the others. Make sure you always have the layers palette open on your workspace so you can easily identify the layer you are currently using or access the one you want. You will also find it easier to group a number of layers into one group so that you can instantly hide or apply some effects to all the concerned layers without having to access them one by one.
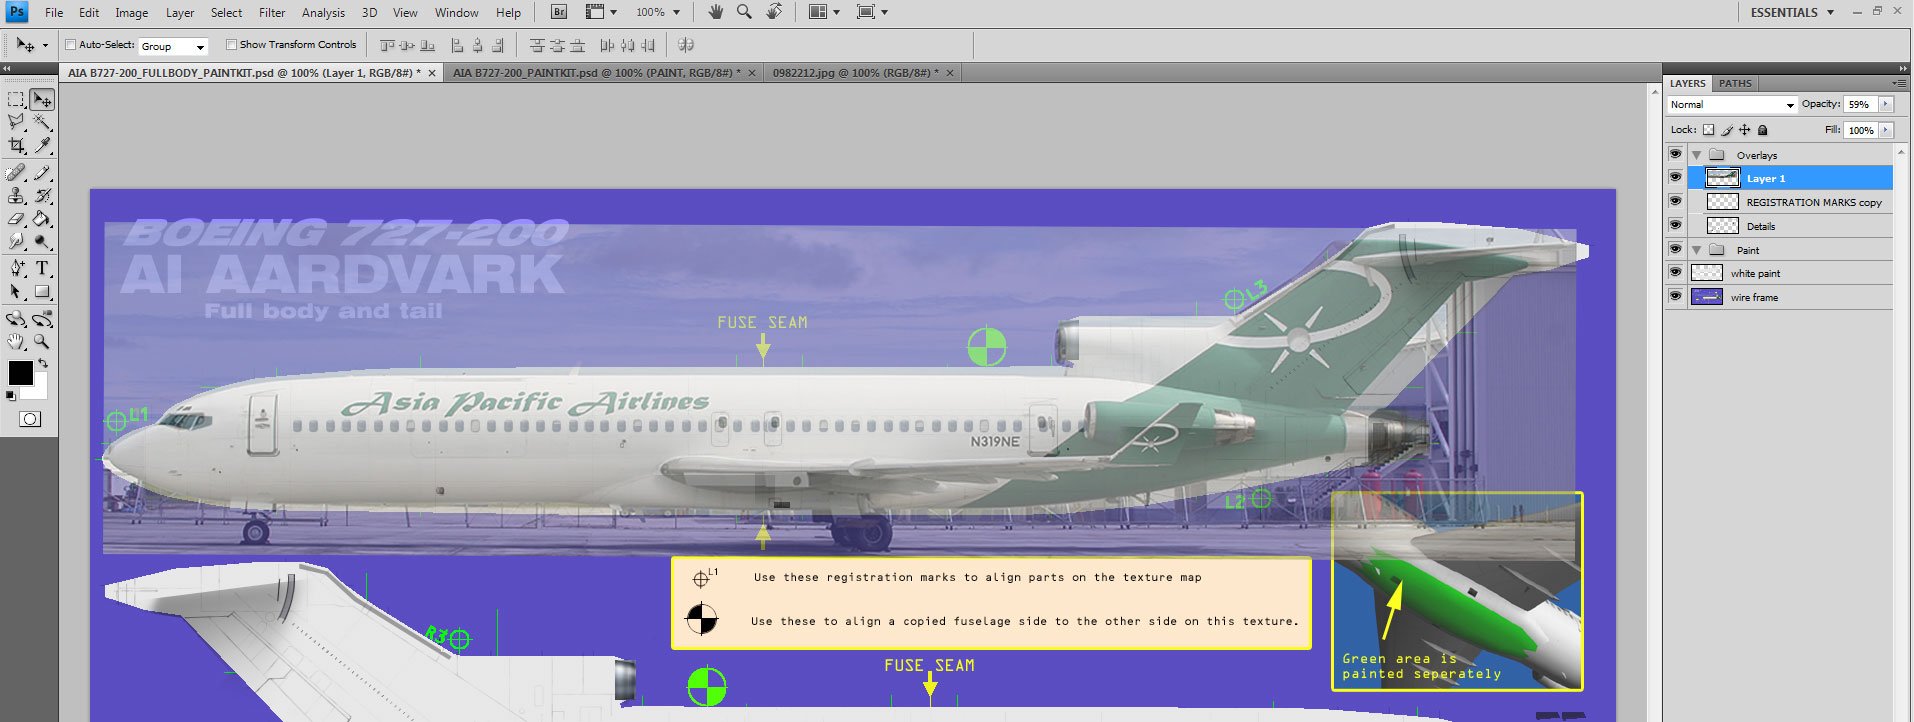
Right now, we have the image pasted in the paintkit and you can see that it has added its own layer that is currently highlighted. By default, each new layer gets a numerical “layer n” name, but you can give them names so that you can identify them more quickly. But more on this later. For now, we have this picture in the paintkit and do you know why? Because we will use it to copy the main livery features on the paintkit by transparency. Of course, we could do it manually, but why reinvent the wheel? So let’s start using the magic of layers to get things done easily! In the layers palette, the picture layer is highlighted and you can move it up or down in that palette so that it will be over or under the others. In this case we want it to be on top of the paintkit, so if it not yet there, we will move it to the top of the list, putting it effectively on top of the other layers, and covering them. But since we want to see what’s going on under it and how we are going to make it fit precisely the fuselage shape, we will make it a bit transparent. Still in the layers palette, you will see at the top a box named opacity. Using the slider, we will decrease the opacity to around 50% so that we can still see the picture, but also the fuselage shape under it. Now, we will change the image size to make it match the paintkit. To do this, from the main top PS menu, we will select edit/transform/scale. You will notice that the selected layer is now surrounded by a frame with anchors at the corners.
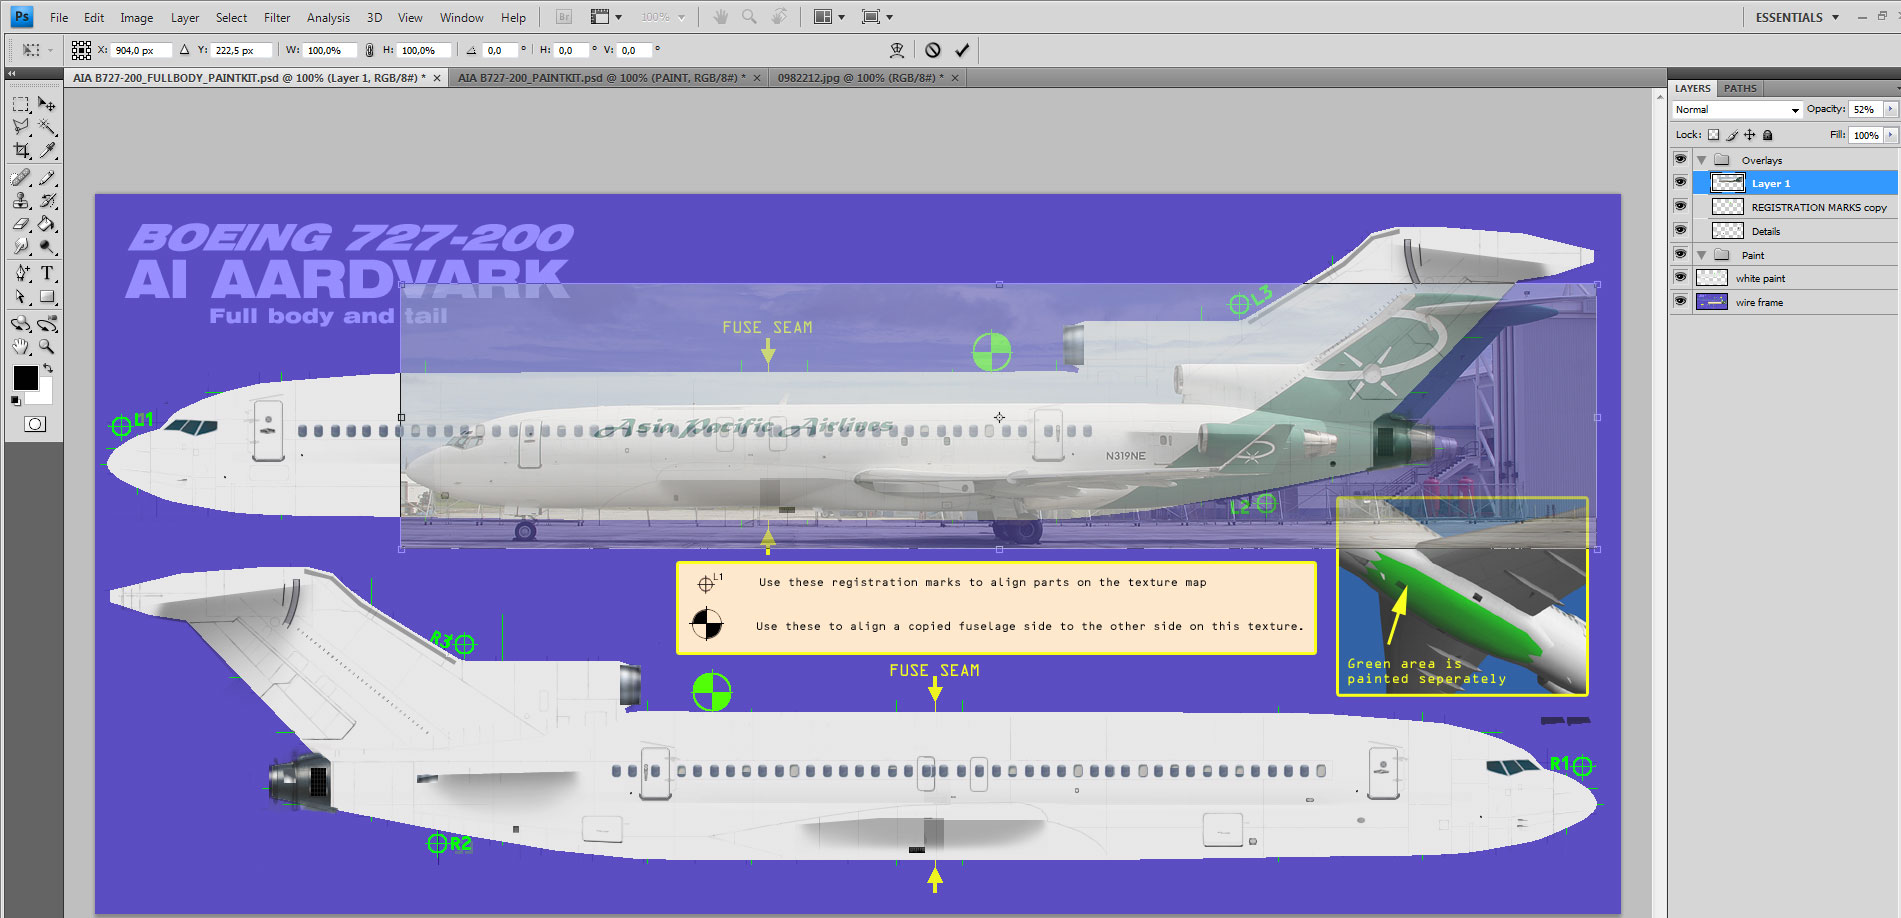
Now using the move (“multiarrow”) tool, we will move the layer and selecting one corner anchor, we will stretch the image until it matches the fuselage on the paintkit. This is why it is important to use a picture that is as much as possible a full side view with as little distortion as possible
But you want to stretch the image symmetrically, keeping its length/width ratio, and to do that you have to press the Shift key on your keyboard (the arrow sign above the Ctrl key) to lock the transform tool. You can also select edit/transform/rotate to make the image fit the paintkit profile as much as possible. Of course, you can not get a 100% match as the paintkit is flat while the picture reflects the 3D shape of the nose, tail and so on. A good reference point is usually the over wing emergency exits, the doors, the window line generally (well in this case, not many windows to use, eh?) and of course we will later adapt the livery to fit the paintkit more precisely.